Aunt Chucky Ducky (that is what I call my dear Charlie Fritts) was here last week. She was going through a box of cards I have gotten at Leadership 2012 and Convention 2012. She found one card and asked me to make sure to add it to my September Card Class.
I received the original card at Leadership 2012 from Julie LeBlanc of Guelph, Ontario, Canada. Julie does have a website if you are interested in seeing more of her creations. It is www.kewlstamps-n-more.blogspot.com
Julie made a lovely card in Elegant Eggplant, and Certainly Celery on a Whisper White base. She did use Watercolor Paper for her stamped image. See her lovely work below:
Well, I tweaked her original design to make the "cased card" my own. I have 2 samples to share with you. When I offer this card in my September card class, each stamper will have a choice of sentiments from the stamp set Perfectly Penned (Item #122892). There are 4 sentiments in that set - Thank You, Celebrate Today, Get Well and Happy Birthday. Here is my version of Julie's card:

I replaced her embossing folder choice with the new Delicate Design Folders (Item # 127023) and then I used the new Large Scallops Edgelits (Item # 127019) to cut out the Certainly Celery cardstock. I did NOT use the Scallop Trim Border punch at all.
Then I changed the ribbon from the Elegant Eggplant 1/2" inch Scallop Ribbon to a softer Perfect Plum 3/8" inch Taffeta Ribbon.
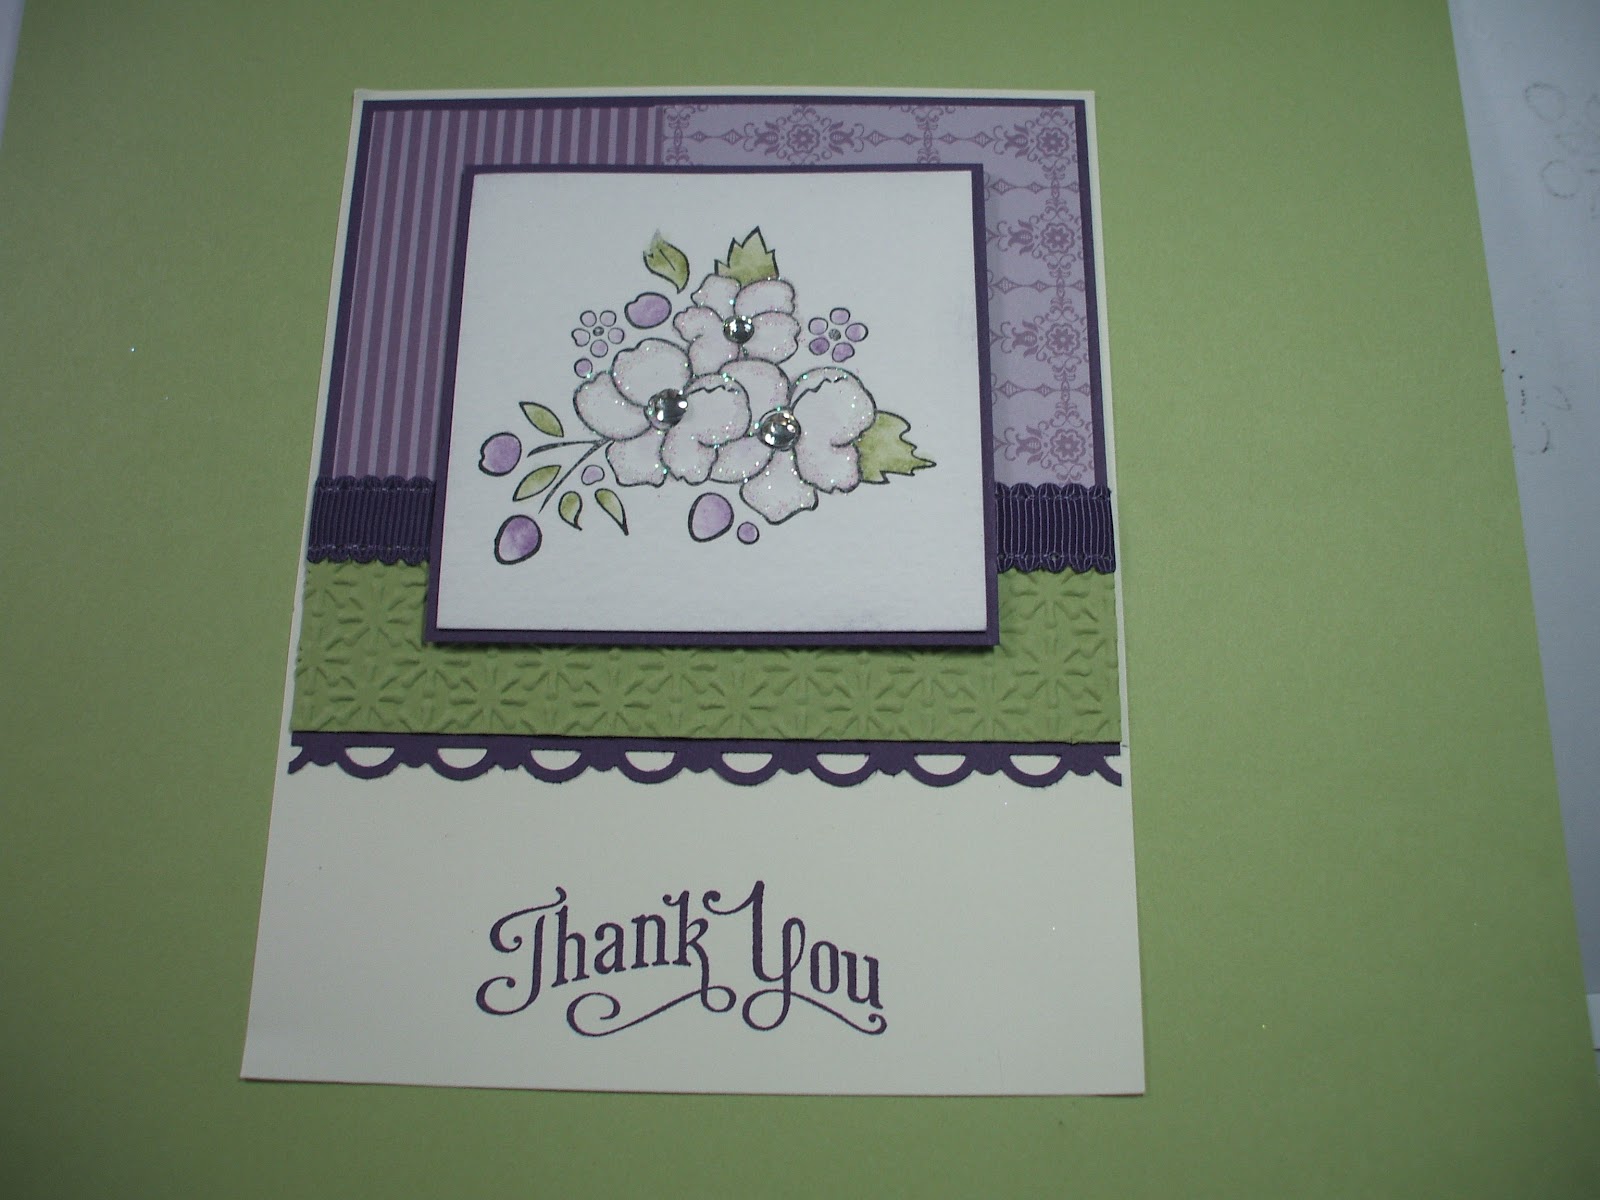
I used the Perfect Plum Striped DSP along with my Certainly Celery on a base of Naturals White cardstock. I add the Perfect Plum Taffeta Ribbon and then mounted that to a Perfect Plum Mat. Note that the ribbon does not go around the Perfect Plum mat. Then mounted it to my cardbase of Naturals White cardstock. For me, I matted the design onto Perfect Plum cardstock. I next stamped my sentiment in Elegant Eggplant. After I watercolored the design (see below for details), I used Stampin Dimensionals to add it to my card.
What did I leave the same? I left the stamped focal image of the flowers from Bordering on Romance (Item # 125482) stamped with Black Stazon onto Watercolor Paper (Item # 122959). Then I watercolored the image with a Blender Pen (Item # 102845) using my Perfect Plum Marker and my Wild Wasabi marker. The Certainly Celery marker was too light. I also colored the edges of my flowers with the Blender Pen and the Perfect Plum Marker. Afterwards I used a 2 way Glue Pen (Item # 100425) to go around the edges of each flower. I then, dipped my image into Dazzling Diamonds (# 102023) and thumping off the excess. Don't forget to add the Rhinestones to the centers of your flowers.
Arlene hint -> I use plastic sandwich containers to keep my Dazzling Diamonds and Embossing Powders. I find it easier to open a container and sprinkle my Dazzling Diamonds or Embossing Powders over an image and allow the excess to fall back into my container. So much easier for me than trying to get it back in the little jar... plus I can put several containers of Dazzling Diamonds into my plastic container at one time! For each plastic sandwich container, I label the outside of them with the name of the contents on all 4 sides. I know it sounds like overkill, but believe me (personal experience talking) when I tell you I got Dazzling Diamonds and Irridescent Ice mixed together once... sigh. Easier on me to make sure whichever side of the container I see on my shelf, I can see the content name! Also never use these items with a fan blowing or the heat gun until AFTER you close the container.
Here is another variation of Julie's card with only a change in the sentiment.

Overall, Julie had a great card design, but I wanted to tweak the design to make it mine. I took her design as the starting point of my card, changed a few items and came up with a new look to the card.
Hope you enjoyed this explaination of casing and tweaking. I should be posting at least 3 times a week now that my school routine and lesson plans have settled into place.
Also, I have all my September Card and Scrapbooking classes set up. I did send out emails advising of the times and dates. You must RSVP to ensure a seat at the class of your choice. All the card classes are the same for the month of September. This allows me to repeat the class for up to 24 stampers. Remember I do classes of 4 people at a time so you get more personalized instruction and rarely do the 12 person classes any longer.
This month we are beginning our Technique card classes. You will make 5 cards and the 5th card is a special technique card. You will also make a 4 1/4" x 5 1/2" Technique File/Flash card with a sample of the technique on it as well as the directions on how to do that technique. This month's technique is Triple Time Stamping.
September Class Schedule
* Saturday, September 8th 10:00 a.m. - 1:00 p.m. Card Class for my Chemo Nurses
* Tuesday, September 11th 6:00 p.m. to 9:00 p.m. Card Class
* Thursday, September 13th 4:30 p.m. to 7:30 p.m. Card Class
* Saturday, September 15th 9:00 a.m. to 12 noon Card Class
* Saturday, September 15th 1:00 p.m. to 4:00 p.m. Scrapbooking Class
* Tuesday, September 18th 6:00 p.m. to 9:00 p.m. Card Class
* Thursday, September 27th 4:30 p.m. to 7:30 p.m. Card Class
* Saturday, September 29th 9:00 a.m. to 12 noon Card Class
* Saturday, September 29th 1:00 p.m. to 4:00 p.m. Scrapbooking Class
Again, remember to RSVP to hold your seat. Classes are held in my home and I hope to see you there!
Arlene
Both cards are lovely!
ReplyDelete